Building a battery-powered wireless sensor using Bluetooth Low-Energy (BLE) and Apple HomeKit (Part 3)
— hardware, software, internet-of-things, bluetooth-low-energy, arduino, c, homekit, nrf52832 — 8 min read
This is the third post in a series about building a simple wireless temperature and humidity sensor using inexpensive components, Bluetooth Low Energy (BLE) for communication, and Apple HomeKit to read sensor values. For the previous post, see Part 2.
In the previous post, we covered the hardware selection, hardware assembly, and software architecture. In this post, we'll cover the last, crucial piece needed to make everything work: the software implementation.
This post includes the source code and all the information you need in order to get your own sensor and bridge hardware running.
Source code repository
The source code for this project can be found on GitHub at danielpgross/homekit-ble-temp-humid-sensor.
If you'd like to follow along with the instructions using your own bridge and sensor hardware, you'll want to start by cloning that repository to a local place.
Sensor module
The sensor module runs on the WRL-13990 Bluetooth module, which is built around the nRF52832. Its purpose is to take readings from the temperature/humidity sensor and relay those readings back to the HomeKit bridge (see the bridge module below).
Implementation discussion
The nRF52832 is a system-on-a-chip (SoC) built around the ARM Cortex M4 processor. Nordic provides a software development kit (SDK) that allows developers to write C code to program the device. Additionally, the chip is programmed by default with a "softdevice" that manages the fine details of BLE communication, allowing the developer to focus on the business logic of the application at hand.
This diagram from the S132 SoftDevice specification illustrates the general architecture of software implementations on the nRF52832:

For more information on the nRF52832's software, check out the following resources:
The nRF52832 can be very tricky to program because there's very little transparency into what's going on inside the device. Although it's possible to set up a line-by-line debugger, this requires extra hardware, as far as I was able to find. Therefore, programming the devices requires lots of patience :-)...
Making the SDK code build and run on the WRL-13990
Nordic's SDK code is written to support different boards built on the nRF52832, but not including the WRL-13990. This meant that some wrangling was necessary to get the code to build and run properly on the WRL-13990. Luckily, I was able to get this working by cobbling together other pieces of code that I knew worked on the WRL-13990, including the nRF5 Arduino core code.
Temperature readings
The nRF5 SDK does not natively support reading data from the DHT-22 sensor. This turned out to be more complicated than I thought, but I fortunately stumbled across Gabor Paller's blog post on using the DHT-22 with an nRF51822. He wrote a complete implementation for reading DHT-22 sensor values and I was able to use this directly in my own implementation.
BLE broadcast format
The sensor module broadcasts readings with the BLE service ID 7B18 and with the actual temperature and humidity readings in the BLE GAP service data. Using this approach, a listening device does not need to pair with the sensor, it just needs to look for the appropriate service ID and then read the value of the service data. To see exactly how the temperature and humidity are encoded, see the decoding implementation.
Using it yourself
The following is copied from the README file in the source code repository. Please see that file to keep up to date with any changes.
This is firmware code for the nRF52832. To use it, you need to compile it to binary code and then flash it to your device.
Requirements
- The nRF5 SDK, which provides the necessary compilation resources and tools. Instructions to download it are in step 1 below.
- Installation of version 0.5.2 of Nordic's nrfutil program. Installation instructions are provided at the source.
Compilation & flashing
- Download the nRF5 SDK version 11.0.0.
wget https://developer.nordicsemi.com/nRF5_SDK/nRF5_SDK_v11.x.x/nRF5_SDK_11.0.0_89a8197.zip- Unzip the SDK.
unzip nRF5_SDK_11.0.0_89a8197.zip- Navigate to this path within the unzipped SDK folder:
examples/ble_peripheral/.
cd nRF5_SDK_11.0.0_89a8197/examples/ble_peripheral/- There, copy the entire folder containing this file, with the directory name
ble_app_temp_humid.
cp -R /path/to/repo/sensor ./ble_app_temp_humid- Build the code.
cd ble_app_temp_humid/wrl13990/s132/armgccmakeYou should see build output as follows:
rm -rf _buildecho MakefileMakefilemkdir _buildCompiling file: app_button.cCompiling file: app_error.cCompiling file: app_error_weak.cCompiling file: app_fifo.cCompiling file: app_timer.cCompiling file: app_trace.cCompiling file: app_util_platform.cCompiling file: fstorage.cCompiling file: nrf_assert.cCompiling file: nrf_log.cCompiling file: retarget.cCompiling file: nrf_delay.cCompiling file: nrf_drv_common.cCompiling file: nrf_drv_gpiote.cCompiling file: pstorage.cCompiling file: bsp.cCompiling file: bsp_btn_ble.cCompiling file: main.cCompiling file: dht22.cCompiling file: RTT_Syscalls_GCC.cCompiling file: SEGGER_RTT.cCompiling file: SEGGER_RTT_printf.cCompiling file: ble_advdata.cCompiling file: ble_advertising.cCompiling file: ble_bas.cCompiling file: ble_bps.cCompiling file: ble_conn_params.cCompiling file: ble_dis.cCompiling file: ble_srv_common.cCompiling file: device_manager_peripheral.cCompiling file: system_nrf52.cCompiling file: softdevice_handler.cAssembly file: gcc_startup_nrf52.sLinking target: nrf52832_xxaa_s132.outPreparing: nrf52832_xxaa_s132.binPreparing: nrf52832_xxaa_s132.hex
text data bss dec hex filename9332 124 768 10224 27f0 _build/nrf52832_xxaa_s132.out- Connect the WRL13990 to your computer and begin flashing the compiled firmware. I used the following command to accomplish that using a FT232RL-based USB-to-serial board.
nrfutil dfu genpkg --application _build/*.hex pkg.zip && nrfutil dfu serial --package=pkg.zip --port=/dev/cu.usbserial-00000000 --baudrate=38400With the following output.
Zip created at pkg.zipUpgrading target on /dev/cu.usbserial-00000000 with DFU package /Users/danielgross/Desktop/ard-temp-sensor/nrf52/nRF5_SDK_11.0.0_89a8197/examples/ble_peripheral/ble_app_temp_humid/wrl13990/s132/armgcc/pkg.zip. Flow control is disabled. [####################################] 100% Device programmed.Bridge module
The bridge module can run on any device capable of Bluetooth and wifi communication, as well as running node.js. The bridge's purpose is to receive the temperature readings broadcast by the sensor module and retransmit those over the HomeKit protocol.
Implementation discussion
HomeKit specification
Until earlier this year, the details of the HomeKit specification have been kept private by Apple and only made available to members of the MFi program. Since the MFi program requires submitting an application and paying a membership fee, this information was not available to hobbyists looking to play with HomeKit devices. Fortunately, however, earlier this year Apple made the HomeKit specification available for personal, non-commercial use. The HomeKit specification can now be accessed for free after creating an Apple Developer account and agreeing to use the documentation only for non-commercial purposes.
HomeKit framework
As discussed in the first post of this series, I decided to use HAP-NodeJS, a node.js-based implementation of the HomeKit protocol. Since it already implements the details of the HomeKit protocol, implementing our sensor bridge becomes as simple as listening for the BLE broadcasts from the sensor and then calling the appropriate HAP-NodeJS APIs.
HAP-NodeJS is meant to run as a single server instance as opposed to a separate instance for each accessory. Therefore, the accessory code for this module is written to be integrated into a HAP-NodeJS instance as opposed to standing on its own.
BLE framework
To listen for BLE broadcasts, I used the noble module, which was the only complete node.js BLE implementation I could find. noble is well designed and generally easy to work with, although as of this writing it does not yet support the latest version of macOS.
Using it yourself
The following is copied from the README file in the source code repository. Please see that file to keep up to date with any changes.
The code is a node.js module that is written to be integrated into an instance of HAP-NodeJS.
Requirements
The following applications and libraries need to be present in order for this module to work:
- node.js and npm
- Libraries for building HomeKit and Bluetooth components. These can be installed on Ubuntu/Debian using:
apt-get install build-essential python libavahi-compat-libdnssd-devnpm install -g node-gypInstallation
If you have an instance of HAP-NodeJS, you can skip to step 3.
- Install HAP-NodeJS.
git clone https://github.com/KhaosT/HAP-NodeJS.gitcd HAP-NodeJS- (recommended) Remove sample accessories from HAP-NodeJS instance.
rm accessories/*_accessory.js- Copy TempHumidSensor_accessory.js into accessories folder.
cp /path/to/repo/bridge/TempHumidSensor_accessory.js accessories/- Install node modules.
npm install- Manually install the
nobleBLE module in the HAP-NodeJS root. This is required for the temperature/humidity accessory.
npm install noble- Finally, start HAP-NodeJS.
node Core.jsEnd-to-end demonstration
At last! We've completed building the hardware and software for the project and it's time to see the fruits of our efforts. Once you've followed the instructions in the above sections to get the sensor and bridge modules running, the final step is to complete accessory pairing in the Home app on your iOS device.
- Turn on the sensor by connecting it to power.
- Activate the bridge module by starting HAP-NodeJS (see above).
- On your iOS device, open the "Home" app and follow along with the steps below:
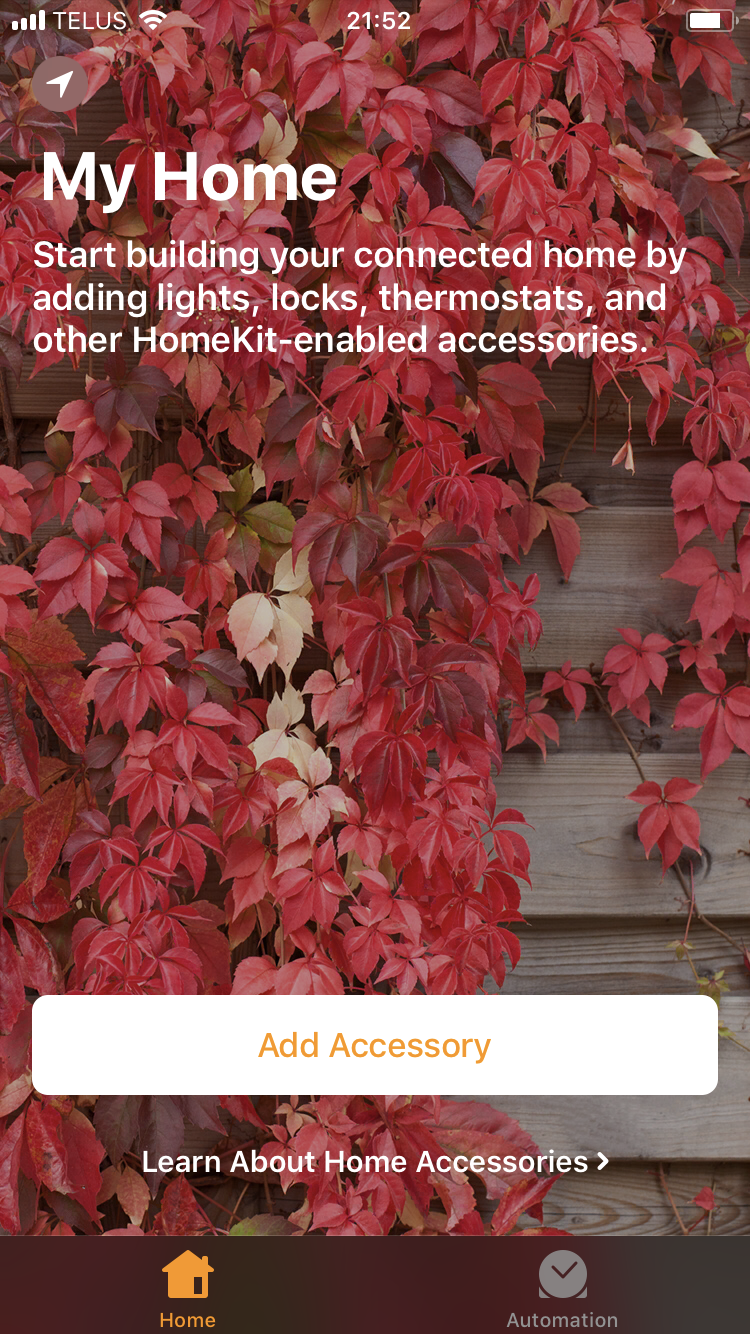
Press "Add Accessory"
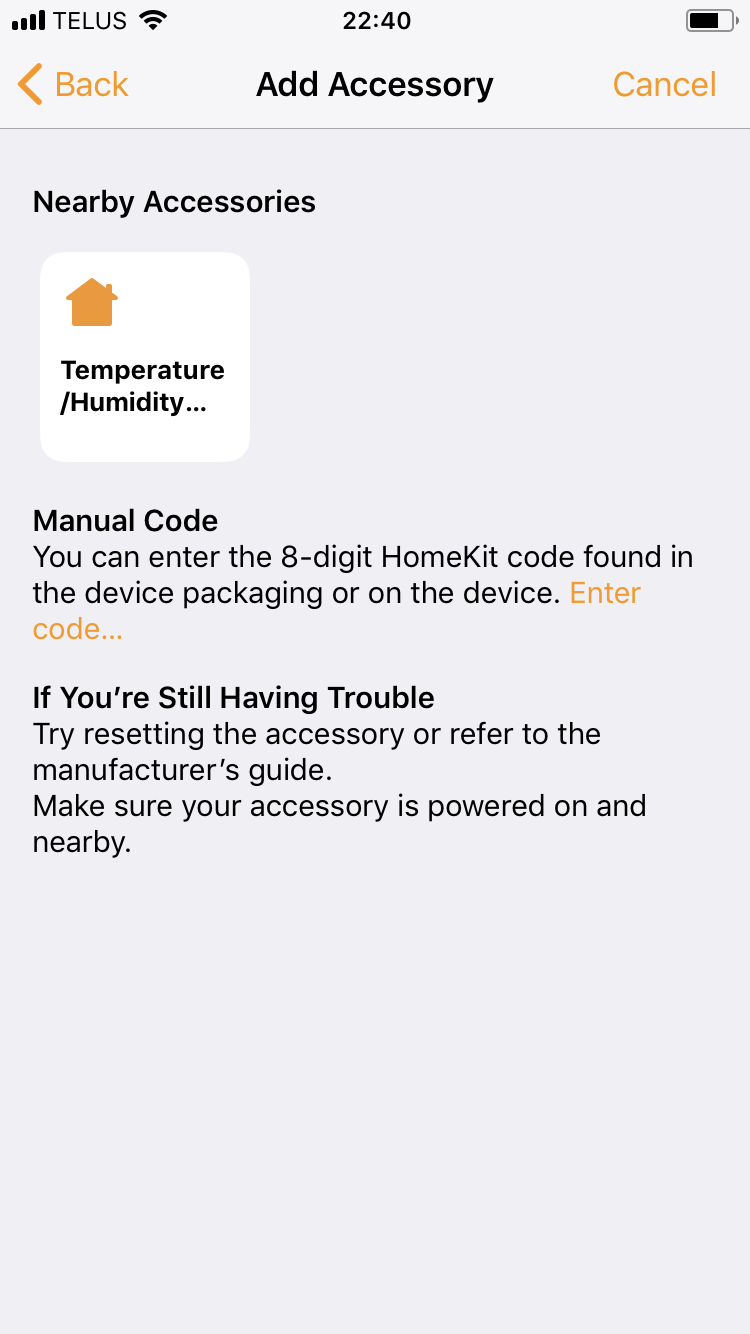
Press "Temperature Humidity Sensor"
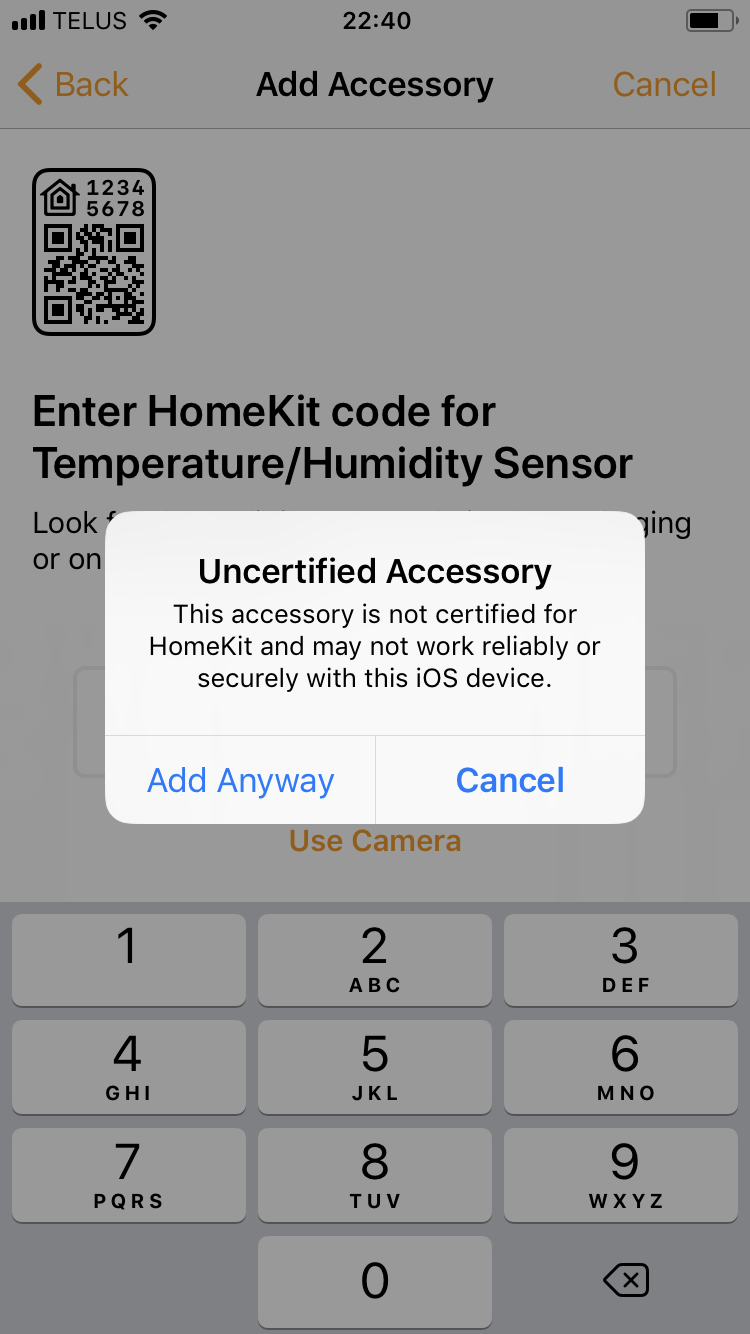
When prompted, click "Add Anyway". Enter the HomeKit Code that's hardcoded, the default is 031-45-154.
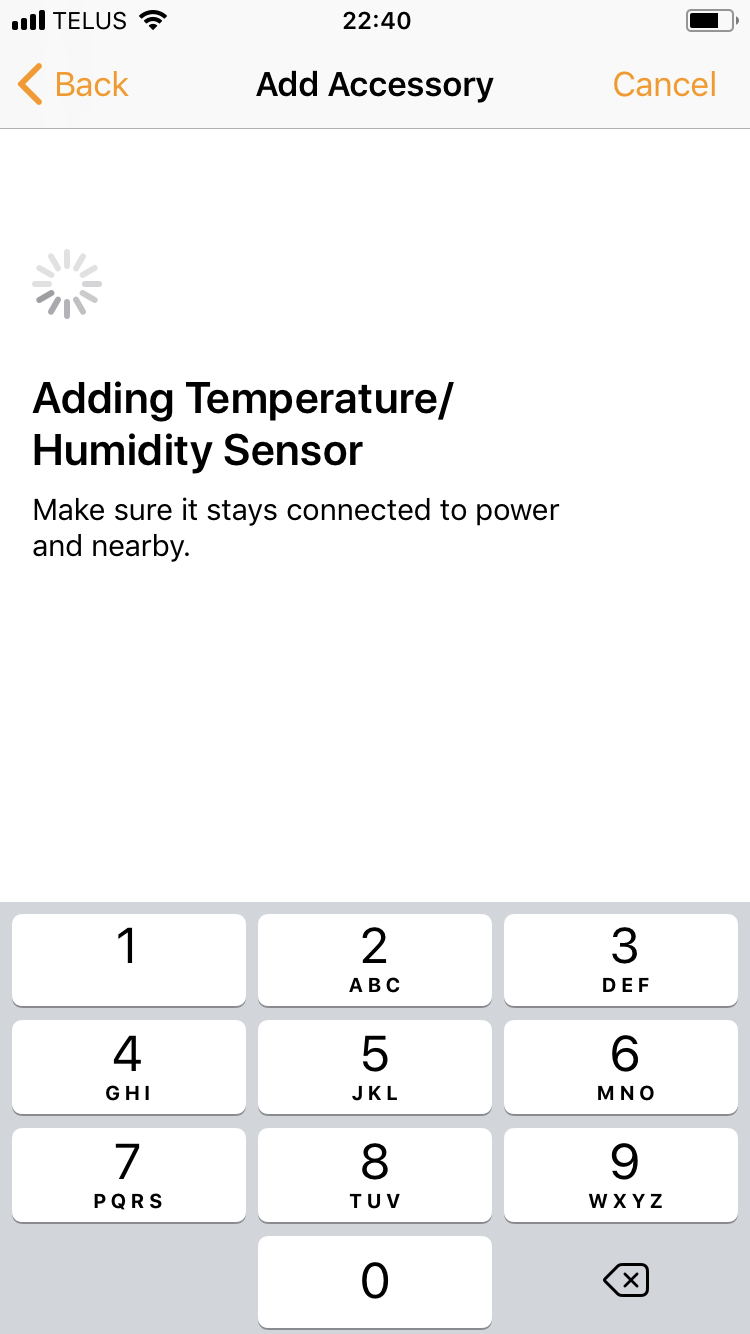
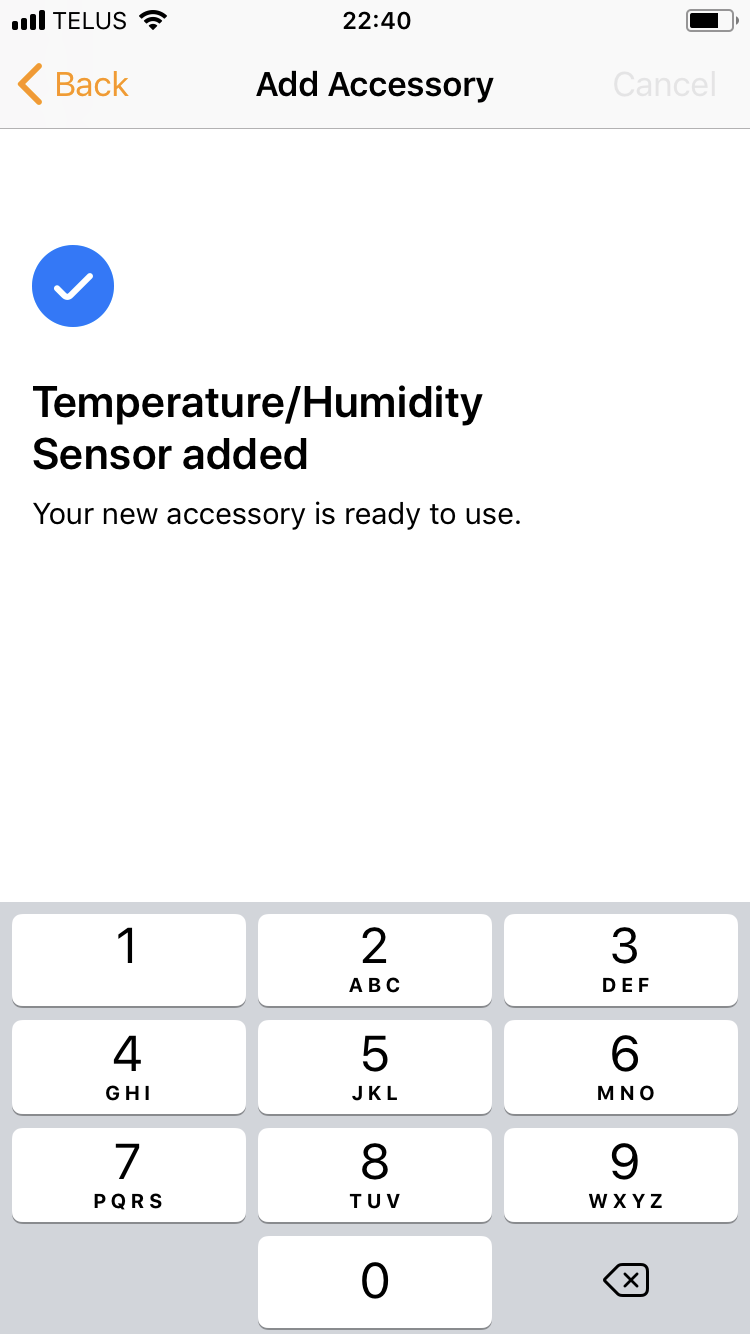
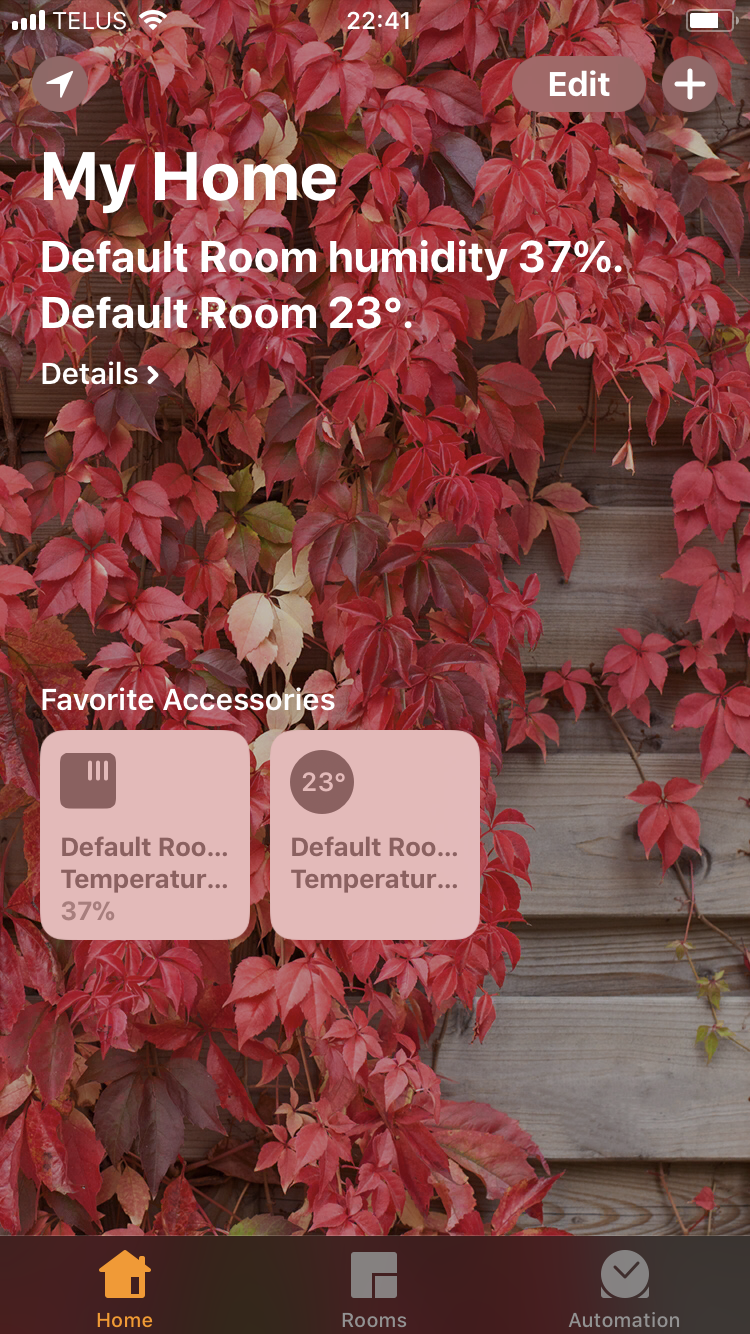
You should now see 2 new accessories and the humidity and temperature displayed at the top!
Thank you for reading this series of posts!